Snares, Traps and Deadfalls w/pics!
Posted: Fri Mar 22, 2013 1:14 pm
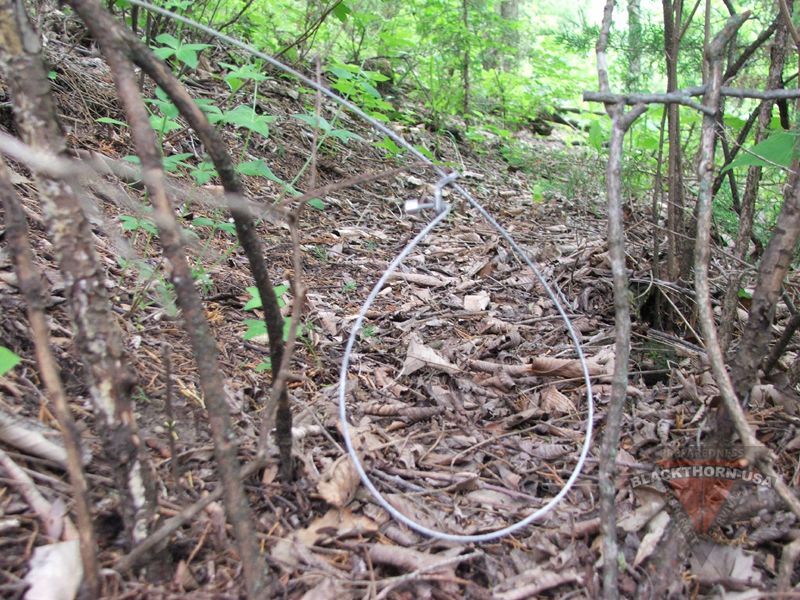
Being able to get food in a survival situation is pretty damn important. Sure you can go without, but do you really want to? You can forage for plants but it takes a lot of wild onions to equal a squirrel in nutritional content.
I’m going to cover some traps in this thread. Once a trap is set, it will work for you while you concentrate on other tasks. Once a trap is made it is generally re-useable/re-settable. Most importantly, a trap will get you meat.
There are many traps out there. A lot of the ones shown in outdoor books are overly complicated and/or don’t work well. I won’t say that the traps I use are the only ones that work, but I will say they work well. And the majority of them are very simple.
I’m going to go over three deadfall traps first and I’ll add to this thread as I have occasion to make different traps. Deadfalls are very simple to make and work exceptionally well on the small animals that you would likely have around you in most any wooded location. Another advantage to deadfalls are they kill your animal quickly. More humane sure, but consider this, if you have a rabbit hanging in a snare, it could bite free of the noose. Or with all the noise it would be making, you could easily lose your meal to a passing coyote or other predator. Deadfalls also often times cover your animal providing even more protection from predators.
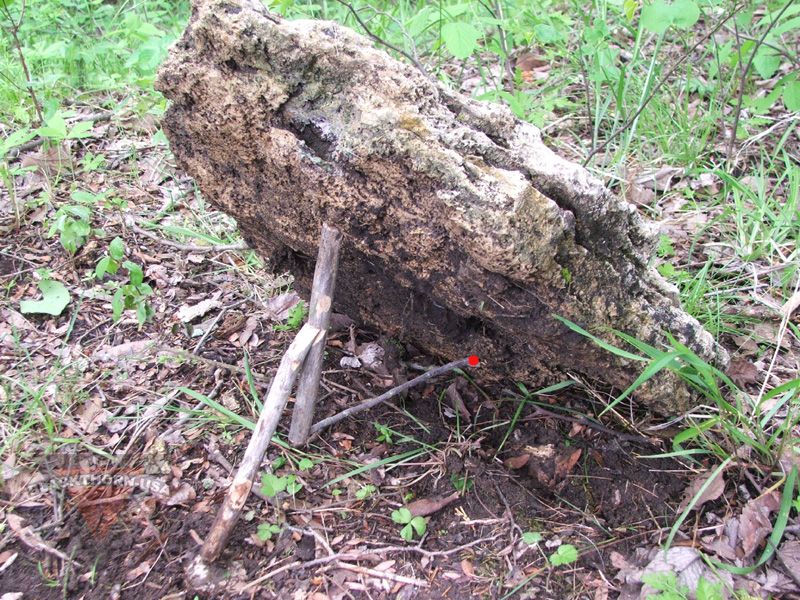
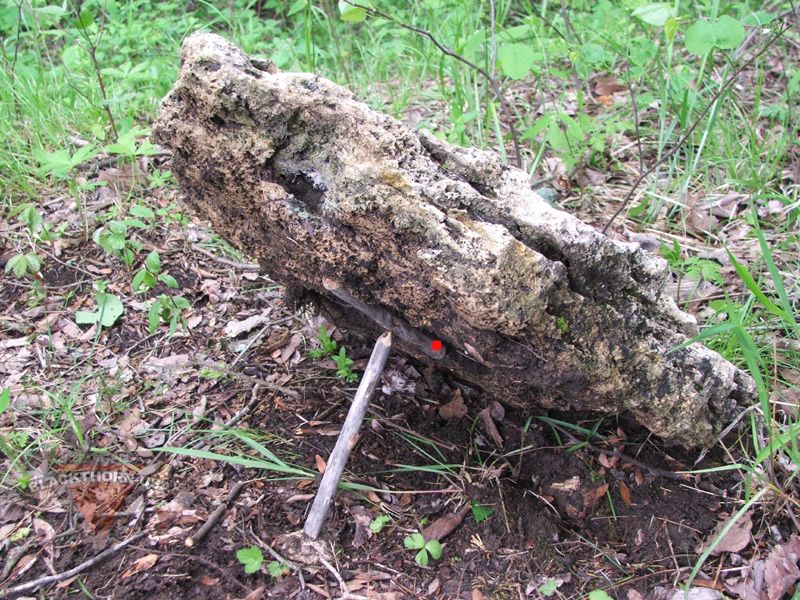
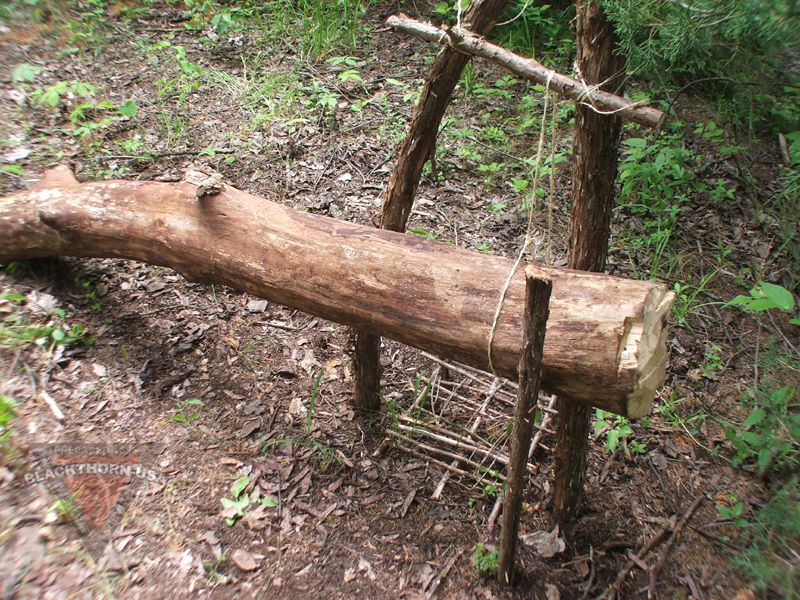
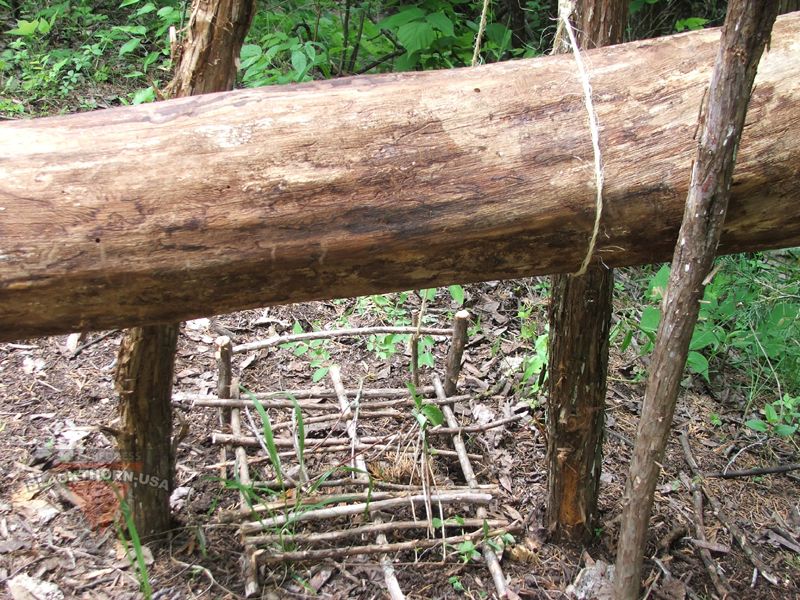
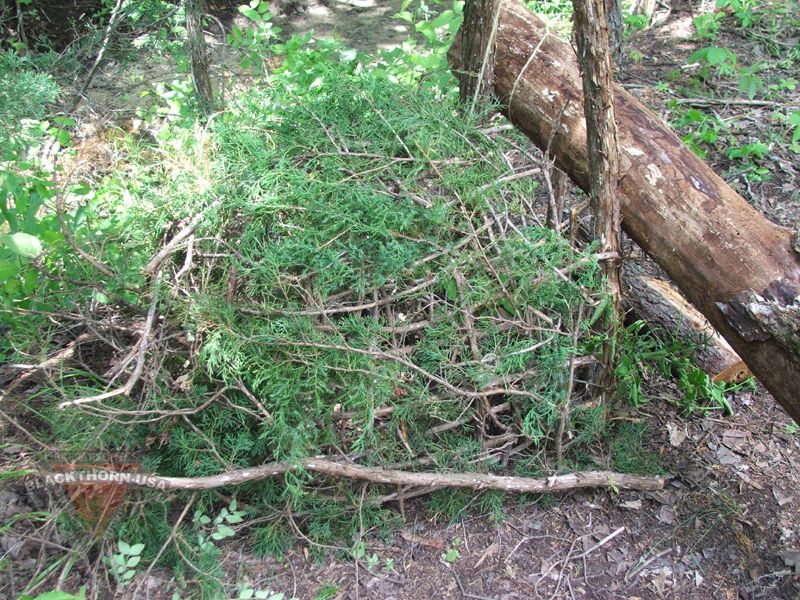
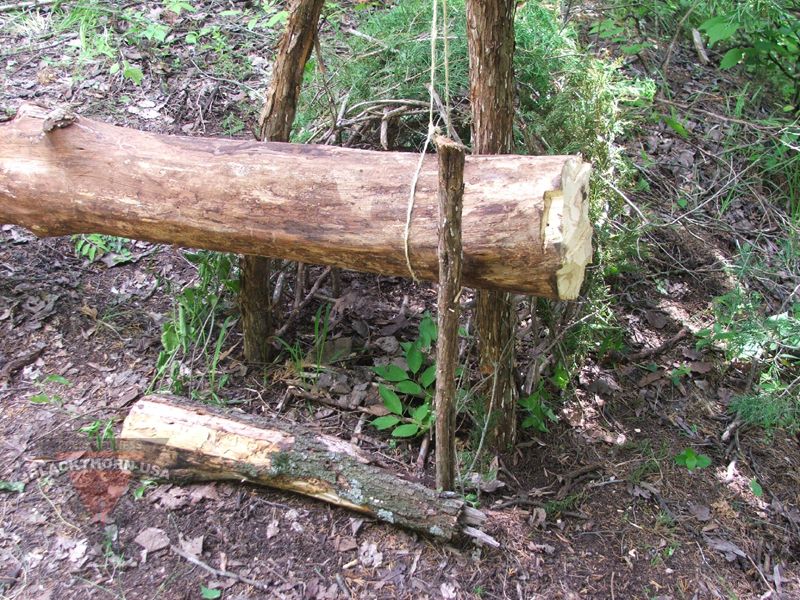
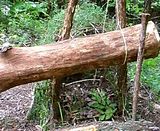
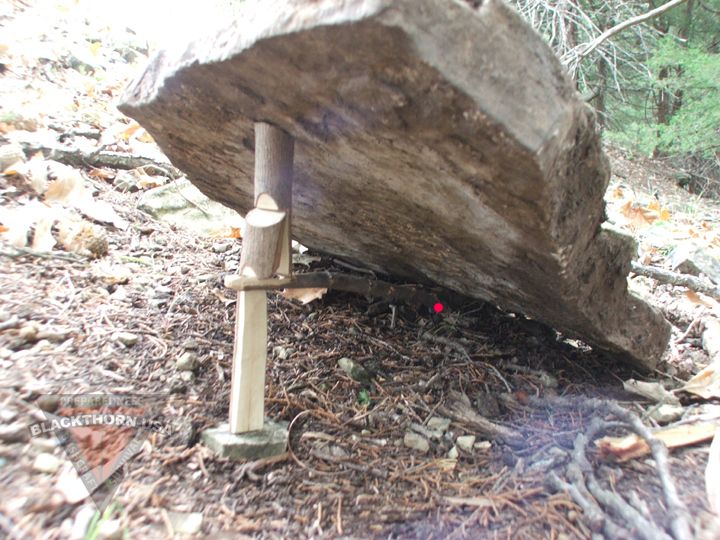
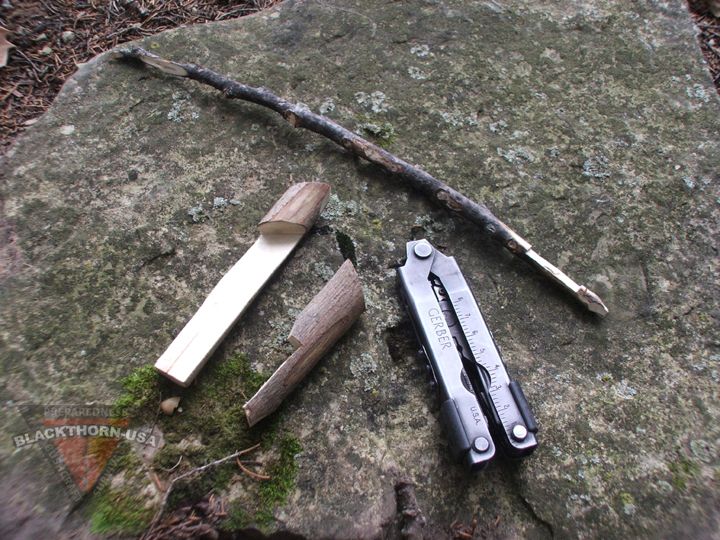
First up is a modified Paiute deadfall. The modifications are (1) the vertical stick has a natural fork to hold the horizontal stick and (2) the vertical stick is pushed into the ground. This makes the trigger much more stable. Be sure that your rock doesn’t hit the vertical stick on the way down.
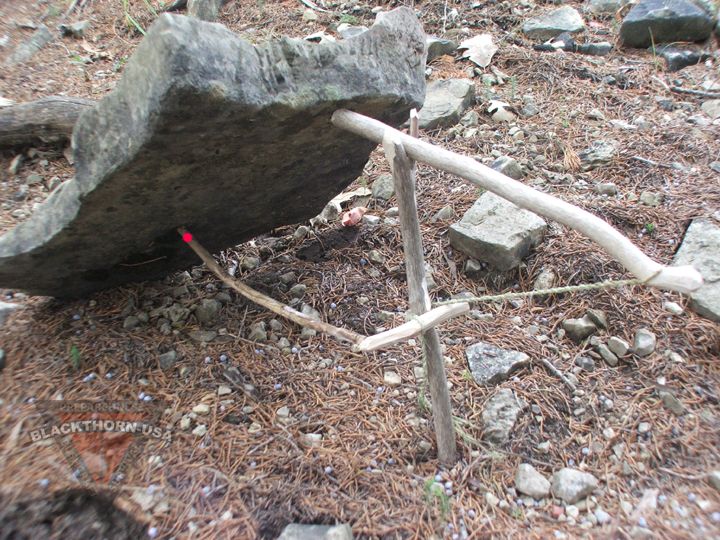
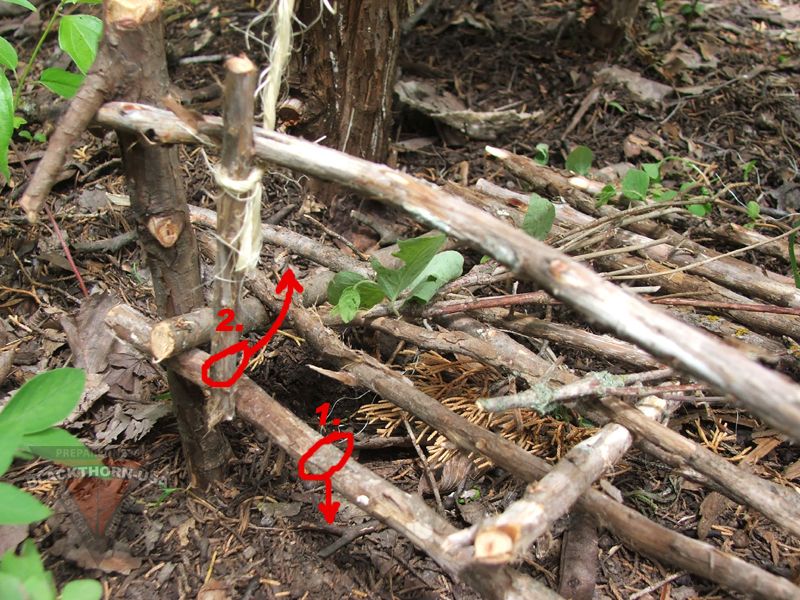
The baited area is shown in red. This end of the stick touches the rock, the other end simply keeps the cord from flipping around the vertical stick. The bait sick can be very thin here, even a thicker grass stem will work as there is very little pressure exerted on this piece.
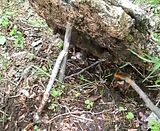
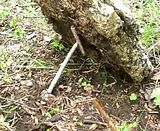
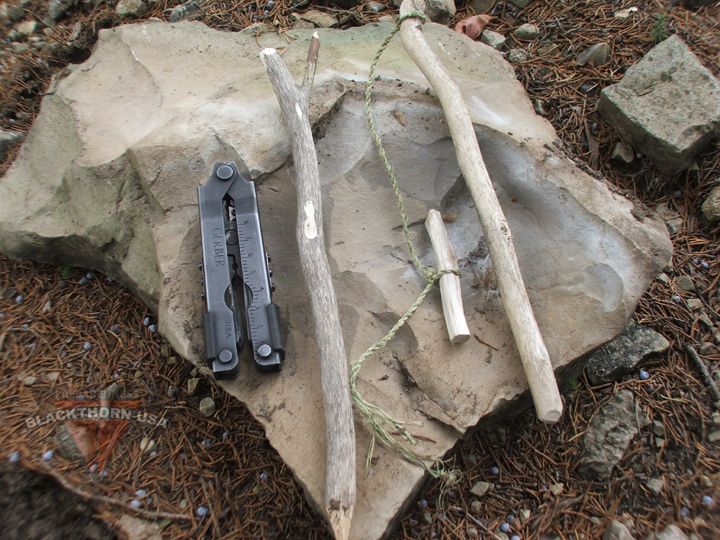
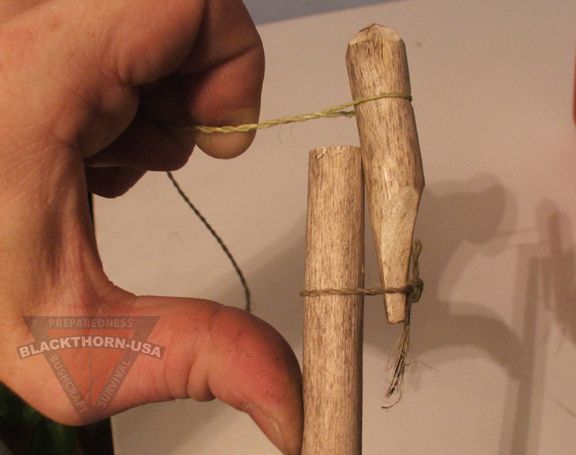
Here is a close-up of the trigger. I have used natural cordage but anything will work fine. The Gerber is just for scale.
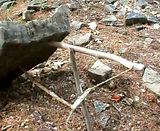
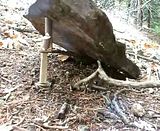
See it in action, click the pic.
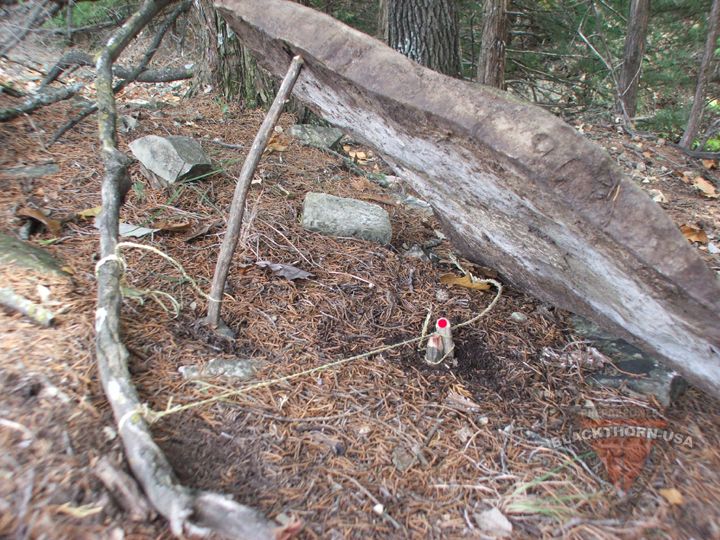
Next up is a very simple trigger. Here you are relying on pressure to keep two round pieces of wood against each other. The slightest movement makes them slip and sets off the trap. On this trigger, you can set the trigger before you place the rock as separate pieces of cordage are used for the bait and rock.
A limb or stick under tension is held by the baited part of the trigger. In this case I am using a dead cedar branch still connected to the tree. You always want to use dead wood for your spring sticks as green wood will bend and lose it’s springiness. The stick holding the rock up is tied to the spring stick with a different piece of cordage. When the trap is set off, this cordage pulls the stick out and releases the rock. This trigger works well horizontally also. Bait placed where the red circle is.
A close-up of the trigger
And action, click the pic.
Now I said most were easy. This trigger is a bit more complicated to build but damn it’s slick. It also is well suited for areas where the rock cannot drive the trigger parts into the ground when it falls. The trigger is released by movement an any direction. A good trap for birds as well as they will perch on the stick to eat the bait.
Basically the downward pressure of the rock makes the two larger sticks want to spread apart at the bottom. The bait stick is notched and holds them together until tripped. Hard to explain, easier to see. Bait placed where the red circle is. The baited stick does not touch the rock in this trap.
Close-up of the trigger.
And the action shot, click the pic.
So there’s three that are easy to learn, easy to set and damned effective. Any questions, lemme know.
I’m going to cover some traps in this thread. Once a trap is set, it will work for you while you concentrate on other tasks. Once a trap is made it is generally re-useable/re-settable. Most importantly, a trap will get you meat.
There are many traps out there. A lot of the ones shown in outdoor books are overly complicated and/or don’t work well. I won’t say that the traps I use are the only ones that work, but I will say they work well. And the majority of them are very simple.
I’m going to go over three deadfall traps first and I’ll add to this thread as I have occasion to make different traps. Deadfalls are very simple to make and work exceptionally well on the small animals that you would likely have around you in most any wooded location. Another advantage to deadfalls are they kill your animal quickly. More humane sure, but consider this, if you have a rabbit hanging in a snare, it could bite free of the noose. Or with all the noise it would be making, you could easily lose your meal to a passing coyote or other predator. Deadfalls also often times cover your animal providing even more protection from predators.
First up is a modified Paiute deadfall. The modifications are (1) the vertical stick has a natural fork to hold the horizontal stick and (2) the vertical stick is pushed into the ground. This makes the trigger much more stable. Be sure that your rock doesn’t hit the vertical stick on the way down.
The baited area is shown in red. This end of the stick touches the rock, the other end simply keeps the cord from flipping around the vertical stick. The bait sick can be very thin here, even a thicker grass stem will work as there is very little pressure exerted on this piece.
Here is a close-up of the trigger. I have used natural cordage but anything will work fine. The Gerber is just for scale.
See it in action, click the pic.
Next up is a very simple trigger. Here you are relying on pressure to keep two round pieces of wood against each other. The slightest movement makes them slip and sets off the trap. On this trigger, you can set the trigger before you place the rock as separate pieces of cordage are used for the bait and rock.
A limb or stick under tension is held by the baited part of the trigger. In this case I am using a dead cedar branch still connected to the tree. You always want to use dead wood for your spring sticks as green wood will bend and lose it’s springiness. The stick holding the rock up is tied to the spring stick with a different piece of cordage. When the trap is set off, this cordage pulls the stick out and releases the rock. This trigger works well horizontally also. Bait placed where the red circle is.
A close-up of the trigger
And action, click the pic.
Now I said most were easy. This trigger is a bit more complicated to build but damn it’s slick. It also is well suited for areas where the rock cannot drive the trigger parts into the ground when it falls. The trigger is released by movement an any direction. A good trap for birds as well as they will perch on the stick to eat the bait.
Basically the downward pressure of the rock makes the two larger sticks want to spread apart at the bottom. The bait stick is notched and holds them together until tripped. Hard to explain, easier to see. Bait placed where the red circle is. The baited stick does not touch the rock in this trap.
Close-up of the trigger.
And the action shot, click the pic.
So there’s three that are easy to learn, easy to set and damned effective. Any questions, lemme know.